Honda Nighthawk

Honda Nighthawk

Tuesday, June 26, 2012

FInal Thought

Well folks, I'm sad to report I sold the Nigh-Thawk. It was time. In a very business decision I decided that the price I was offered was about all I would get no matter how much more I put into the project. For all of my followers, here is my new website where I will surely continue my quest to ride, play with, customize and learn about all types of machines. Thank you for your loyalty and KEEP THE RUBBER SIDE DOWN!

Motorcycle Repair by Chris
http://mcrbychris.webs.com/

Thursday, January 26, 2012

Nigh-thawk Day 28

I am a restless soul. I just spent the last 5 hours toiling away in my shop on ONE SIDE COVER. I couldn't stop. I had to see the new colors. Well, here they are. I had it sanded in the last update, but I filled a crack and smoothed a rough side with some Bondo. More sanding ensued. I layed down 3 coats of primer and wet sanded 400, 600, and 1500. Then, it was decision time. I had an idea for two tone that I wasn't a 100% sold on. I went for it! I had to see both colors together. I do not regret it one bit. Here it is, in all it's glory.


Wednesday, January 25, 2012

Nigh-thawk Day 27

Uh-oh! Look what I did! I accidentally started sanding my side cover for the new paint! I wasn't planning on repainting my bike till next winter, but I bought the new colors and now I just have to see it laid down. I knew I would have to redo the paint from the beginning because of the shotty, quick job I did last year. So, I couldn't just redo the same color and scheme. I started taping off some ideas and landed on one I'm pleased with. The new colors will be a Dark Forest Green and Cream with the possibility of a Gold pinstripe. Here are some pictures of the colors sprayed on some cardboard. Keep checking for new updates throughout!


Friday, January 20, 2012

Nigh-Thawk Day 26

One of the biggest eye sores the Nigh-Thawk had was the left engine side cover. One of the previous owners must have laid it down at some point and it had a nice scrape. Slowly, but surely I'm trying to take care of the details and this one was due. I found a side cover on EBay and ordered it up. After a light cleaning and a little Sharpie over some missing paint I installed the new one. I think its a huge improvement, but I doubt most people would've picked it out right away. Enjoy!


Nigh-Thawk Day 22 Part 2

I have been having so much fun with my bike at my new shop that I actually forgot to post the second half of the SEAT PROJECT! I know all of you loyal readers (Kate) have noticed this atrocity. Well, briefly after removing the old seat cover my girlfriend (Kate) proved to me that she listens when I drone on about my motorcycle. She got me a new cover for my birthday. It was a direct replacement and I went straight to the shop to install it. This was of course my first experience (as with most of the fun custom projects on the Nigh-Thawk) with reupholstering a seat. I pulled out my fairly recently bought hand stapler and did the best I could. After about half an hour I resorted to the dreaded instructions. "You must use an Electric Stapler!". Thankfully, 20 days later Christmas came and so did an Electric Stapler. After some stapling and stretching and stapling and aligning, here's what I got. Enjoy!


Sunday, January 15, 2012

Tuesday, January 10, 2012

Day 24

Tonight, my friend offered up the idea that cafe racers (what I have been catagorizing the Nigh-Thawk as) have lower stance handlebars. Well, I couldn't deny the logic so I flipped them over and reinstalled the controls! I liked it, but the handbar clamp's paint was worn from my keys and it was much more visible with the bars down. I've been planning on powder coating this and several other pieces for some time now, but haven't found the right time or venue. I decided they may look nice painted the same blue as the rest of the bike. Here they are! I'm happy with them!


Saturday, December 17, 2011

Day 23

I decided to start toying with the Nighthawk tonight and got ahead of myself before I took some before pictures. I spray painted the handlebar controls matte black. It is the beginning of my new accent to the bike. I have a few parts that are metal and take a little bit more abuse. To avoid the fading, chipping and wearing away of paint I'll be doing the metal parts with my powder coating machine which I will cover in another blog. Tonight, though was just some leftover spray paint I had laying around the shop. I taped off the parts I didn't want covered or hit with overspray and went to town. To avoid removing all of the wiring I just hung some rags to protect the other parts and let the controls hang. It was a nice, easy touch to add to the bike's overall look.


Saturday, November 26, 2011

Nigh-thawk Day 22

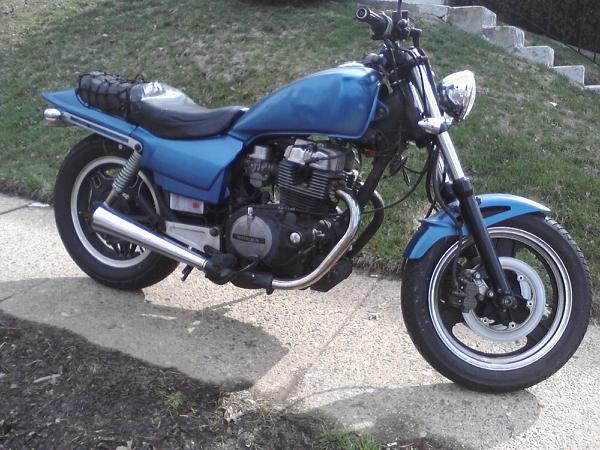
My latest winter project! I removed the seat cover so that I would have to re-cover it this winter.


Friday, April 8, 2011

Nigh-Thawk Day 21


So, not much has been going on since paint. I'm not really sure where else to go with this bike. I added some new grips and I have plans to try to clean up the engine a bit. I have found an exhaust I'm interested in adding but it isn't really within my thin price range at the moment and I'm not sure if I'm going to make the investment. The seat is in the fore front of my brain at the moment. I found a seat cover on EBay which is plain and somewhat on the pricey side. I know I can get something cool if I use the upholsterer my shop uses, as he just made a pretty nice seat out of very little for the current project at the shop. Then there is what most people are in my ear about. DIY. I am certainly considering Doing It Myself since the bike has been so far customized at my hands, but I want the seat to stand the test of time and I'm no seamstress... Updates soon. Here are some pretty pictures to occupy your time.

Thursday, March 17, 2011

Nigh-Thawk Day 20


The big day is finally here! I snuck a preview of the color into the last post I made. It is a metallic Blue. I gave each piece three coats and then three coats of clear. I didn't sand between any coats. I know, I'm lazy. I did manage to put a pretty cool little accent on the fender struts, though. Not to bad for a home garage paint job. It came out a lot lighter than I had thought it would be, but I'll live with it. After having removed my tail section so many times I finally got plugs for my turn signal wires and my license plate light. Much easier to assemble and disassemble. I've going to give it an oil change today, as well, because my oil filter bolt was stripped out for the first one that I did. Now that I found a new bolt its time for a new (much over-do) filter. Well, that's all for now! Time for a ride!